How to Configure Split DNS in OPNsense using Unbound DNS
On my home network, I host a few public facing services that my family and I make use of when away from home such as Plex Media Server. On Plex I have limited the bandwidth remote users may use to be slightly less than the maximum of my upload speed so my home network is still usable. I am using my own registered domain name which I use to refer to devices on my network (both internally and externally, which you can read more about in another article I wrote. I encountered an issue when I used the URL that I use for external access to my server. Plex would treat connections from my local network as a remote connection since it was using the external WAN IP address. This greatly reduced the quality of streaming videos on my network and caused unnecessary transcoding of most of my videos (since I have them encoded in the mp4 format compatible with the Apple TV).
To resolve this issue, I made use of split DNS (aka split-horizon, split-brain, or split-view DNS). Split DNS allows you to use the internal IP address of a device for local users and the external IP for external users. For example, the web address “server.homenetworkguy.com” could point to a public IP address for external users since they will use the public DNS record during a DNS lookup but internal users would access a local IP address such as 192.168.1.10 when visiting “server.homenetworkguy.com”. This scenario can be easily configured in OPNsense using the default unbound DNS service. When performing a DNS lookup, the unbound DNS service will return the local IP address for any hostname/domain name in the list of overrides.
Adding Unbound DNS Override Entries
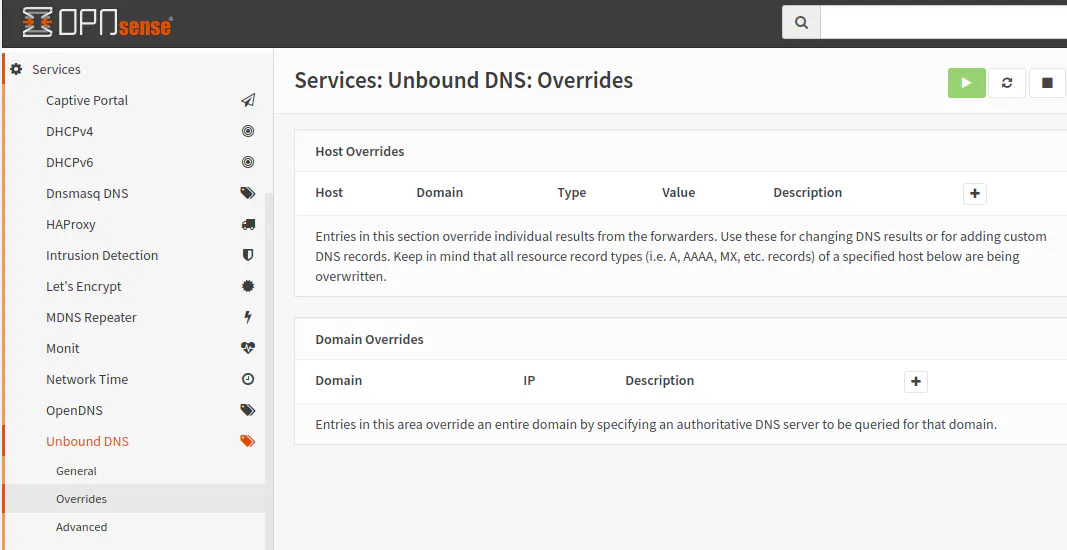
To add a new unbound DNS override, go to “Services > Unbound DNS > Overrides”. You will see sections for host and domain overrides.

For the scenario I described above, the host overrides will be used because we simply want to return a different IP address for specific hosts. I want the server.homenetworkguy.com to return the local IP address. To do so, click on the tiny “+” icon in the right hand corner of the host overrides table.

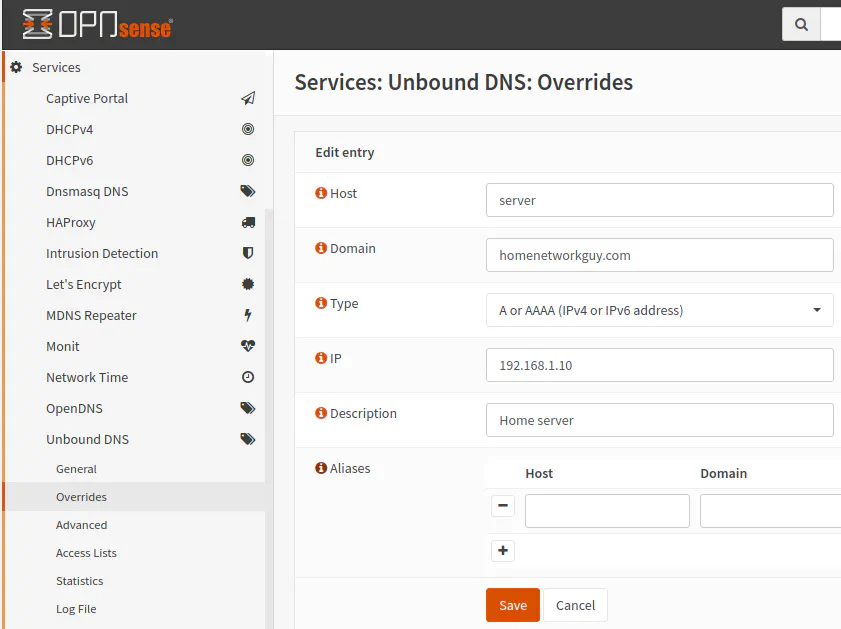
Enter the hostname, which becomes the subdomain of the web hosted service, in the box labeled “Host”. Then enter the domain name. For the “Type”, the default is correct since I am not overriding a MX record for an email server. Enter the desired IP address. In our example, that would be the local IP address of 192.168.1.10. The “Description” box is optional but could be useful if you want to explain what is being overridden and why you are doing it (for your future self that may forget the rationale).
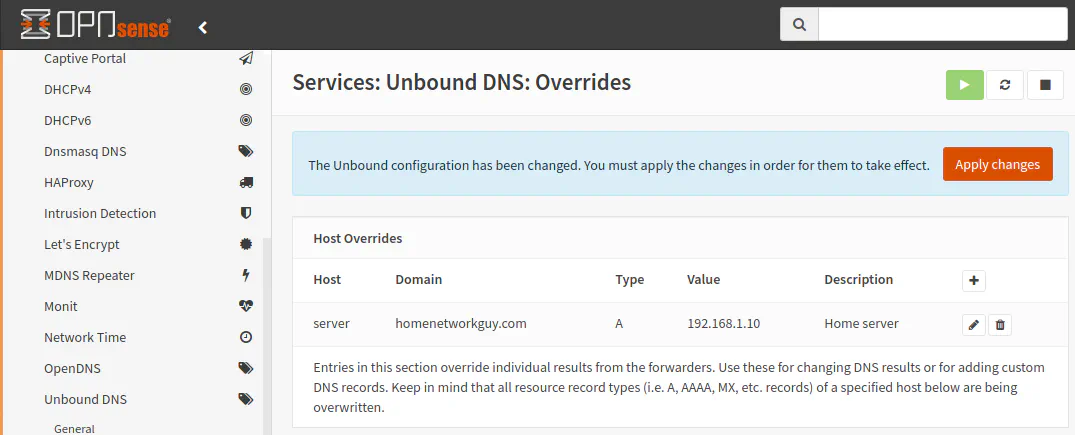
Once you click the “Save” button, the changes will need to be applied in order for the override to take effect.

What about Domain Overrides?
In this example, I used host overrides, but there is also domain overrides. A domain override allows you to specify an alternate DNS server to handle resolving DNS requests for a particular domain name. This option would be useful if you wanted to use a separate, physical DNS server for your internal users.
Some businesses may choose this option to potentially avoid exposing internal hostnames or IP address to the outside world. I do not fully know the implications this may have in reality since software like OPNsense can be used to override specific hostnames/domain names without a need for another dedicated DNS system.
For home users, using host overrides is the simplest route to go that works well, but I know there are some who enjoy building a very complex home network (in a lab or for the actual day to day network) for the joy of learning new things.
A Final Note
I do not currently have the need for split DNS (but I think writing this article may still be useful exercise for learning or for certain users’ needs). I discovered later that the reason I needed to use split DNS when I started using OPNsense was that I was using a subdomain externally to refer to my server, but I was not using a hostname on the local network that matched the subdomain.
I have my server assigned to a static IP address via a static DHCP mapping in OPNsense. Initially, I had a different hostname entered than the subdomain that I was using to access my server. For instance, I was using something like my-server.homenetworkguy.com in my local network but was using server.homenetworkguy.com to externally refer to my home network server. When I changed the hostname from “my-server” to “server”, the server.homenetworkguy.com address now resolves to the local IP address instead of the external facing WAN IP address without the need for split DNS.
However, split DNS could still be useful to me in other scenarios such as websites that I am hosting that use a different domain name than the domain name I use to access my home network. So if I use homenetworkguy.com for my home network, but I am also hosting a website called myownhostedwebsite.com, split DNS could be used for myownhostedwebsite.com to use the internal network IP address. Without split DNS, the external WAN IP address or the CDN/proxy IP address (if you use Cloudflare, for instance) will be used just as though you were accessing the website away from home.


